Following my tutorial on how to make a bedside tidy, next up is how to make a sewing machine cover. My sewing machine always seems to be kicking around somewhere in the house as it's not the prettiest thing to look at, the time has come to make it a coat and dress it up a bit. Here is how to do it...
1. Measure your sewing machine, the height, depth and width, taking into account all the bits that stick out from the sides. Using these measurements, make a pattern out of newspaper; 4 sides and a top.
2. If you have a handle on the top and want to make a hole so that you can pick it up with the cover on, follow these steps, if not, skip these bits. Mark on the top panel the size of the hole you will need and cut it out.
3. Put it back on the top and see if it is the right size, if not use masking tape (as I did) or stick on extra paper to adjust the size.
4. Once you are happy the hole is the right size, tape the sides to the top panel and place it over your machine, it's easier to leave the sides unstuck so that you can adjust the size if you need to. Make it a bit smaller/bigger shorter/longer as required.
5. Choose your fabric; do you want an all over print, a plain fabric with a pretty border, or plain all over with some applique to personalise it. I chose from these gorgeous Kokka prints. In the end I went for the smaller apple print on the left as it is a slightly heavier weight linen/cotton blend so felt better suited to a cover. The Echino or Kiyohara fabrics would also be ideal.
7. Mark out the hole in your top panel onto the reverse side of the fabric using a washable marker. At this stage I strongly recommend placing the piece onto your sewing maching to make sure you have the hole in the right place as this is the last chance to change it.
8. Draw on a 2cm allowance all the way round outside of the hole, mark out the bit you need to cut out in the middle and then cut it out. You may wish to add some iron on interfacing to make the top panel a little stiffer. If so, use the pattern piece and make the hole 2cm bigger all the way round so that you don't have to sew through the interfacing too when finishing the edges of the hole.
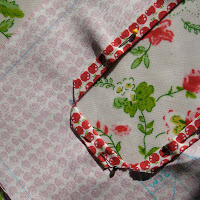
10. Next sew as close to the fold as possible all the way around the outside, when you get to the corners, make sure you capture the diagonal of the fold (below). Also sew around the inside of the seam, again as close the the fold as possible, this will make it stronger. When finished, give it a good iron.
11. Matching the wrong sides together, sew together all the side panels so that you make a tube. Stop 1cm from the top at each seam. Make sure you include all 4 pieces and not do what I did, which was sew 3 together and wonder what the remaining piece was left on the table. Press open the seam allowances.
12. Cut out a 1cm x 1cm square out of the seam allowance (which is drawn on below) at each corner on the top panel, like this...
13. Pin the 'tube' to the top panel wrong sides together. Take care to pin it accurately, matching the corners together. Then sew each side separately, making sure that you go backwards and forwards at each corner to finish them off properly. It should look like this;
14. Press open the seams as far as possible, turn inside out and poke out the corners. Place your cover over your machine and reassess how high the hem should be. My cover ended up a lot more generous than I expected, so I had more hem to turn up, also I wanted it to be clear of the bottom of the machine so had about a 1cm gap between my table and the bottom of the cover.
15. Whatever your resulting hem is, half the distance, fold the fabric onto the wrong side, iron it, fold it over the same distance again and iron again. Sew on the wrong side so that you catch the hem, and sew as close to the fold as you can. This fabric doesn't fray too badly, but I used my pinking shears on all the seam allowances as a precaution.
16. Give it one final iron and you are all done!


Thanks Kate! An actual pattern with pretty pictures should spur me into finally getting around to making a proper cover for my machine- the current tea towel arrangement doesn't keep out the dust..
ReplyDeleteEil