Showing posts with label Janome. Show all posts

Wednesday, 13 February 2013

One year on ...


A year into my 'new' sewing machine and it seems like a good time to review it. I can't believe a whole year has passed since Meg dispatched my old one.

I feel like I have only scratched the surface of the features available, there are still new buttons, menus and feet to explore. But I am picking up new techniques along the way as I need them.


I find myself often referring to the user manual, something I don't normally do with electronics, (it's much more fun to guess and make a mess of things) but this one is easy to use and not only shows me how to use the machine, but sewing techniques too. It's extremely useful.


The joy of electronic rather than manual controls is that when I have messed around with something fundamental like the stitch length or mode, once it has been turned off, it forgets and comes on like new again in standard sewing mode. No unexpected flying off in a zig-zag...


I still love the most basic features; the automatic thread snipper, the see-through bobbin holder (so I can see when I am going to run out), the variable speed control so I can go slow when doing something tricky. And it is so lovely and quiet. I also love the fact it is humming with as yet untapped potential for when I am ready to explore it.


So perhaps not the most illuminating review, but in summary I love this machine. It's seen me through my first year in quilting in style, let's see what the next year holds for us...

Wednesday, 30 January 2013

Velveteen star


Finally; to the velveteen quilt that I made my mum for Christmas. This quilt is entirely inspired by Katy's wonderful quilt that has been on my mind since I first laid eyes on it.

Katy very kindly and patiently answered my various questions on this quilt; I've never sewn with velveteen before and was a little daunted. I sourced my velveteen from all over the interworld, this line is a little old now and harder to come by. Having completed my sister's quilt before the end of November I had a load of time to make this quilt, but ended up making it the week before Christmas after hanging on and on for the background fabric which never arrived. In the end I plumped for this shot cotton and I'm kinda pleased it turned out this way.


Once I started, I was away in a cloud of sewing and productivity and VELVETEEN SNOW. Everywhere and everything was covered in a not so fine layer of the stuff, coming off the raw edges in blizzards. Veleveteen is a bit of a monkey to sew with as it turns out. I chose it because this quilt had to be warm and luxurious, and it fits that bill perfectly. Perhaps then I can forgive it for the snow and the walking about even when pinned together and the stretchiness.


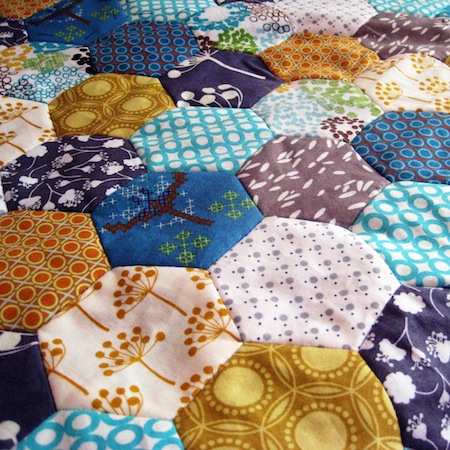
The star is so simple that it goes together really quickly, I think the border that Katy added to this quilt made a huge difference, so I did the same, it also used up a few scraps. Each square was half a fat quarter, I wanted this quilt to be big so that it could be totally wrapped around to create a cocoon - my mum's house gets really cold in the winter.


Still, I didn't really appreciate quite how big it was until the top was finished. Enormous.

Layering it all together was a bit of a headache, but I now pin the backing to the floor so it's taut and work from there, it seems to work. I used the dottie quilt backing in aqua and made an investment buy in this walking foot for my machine...


Wendy very kindly showed me how to fit it (because I was completely clueless).


Next my thoughts turned to quilting and I was frozen with terror. I had 3 days to finish the quilt and needed to keep it simple, stripes came to mind but the wonderful Katy showed me this sketch.


I opted for lines rather than swirls. The joy of quilting it like this was doing it in more manageable quarters, rather than trying to stitch across the whole length of the quilt. So I sewed and I sewed and I watched episodes of ER back to back and eventually it was done. The foot was wonderful leaving me with no problems - well worth the investment.


I used this Aurifil thread as I wanted the stitches to melt into the background. At this point I felt like I could take a deep sigh of relief with my tight deadline and enjoy a night of binding. The quilting took me a couple of afternoons.


I always add any wording to the binding when it's already half sewn on to mimimise the chance of sewing it on upside-down/backwards/on the wrong side. It works.


I love the fact it's quite hidden away on the binding and like a secret message to the recipient.


It was very lovely cozy under the weight of it all, hand-stitching the binding, secretly wanting the quilt for myself. Again, many re-runs of ER were enjoyed in the binding of this quilt.


And the happy mix of joy when finishing a quilt combined with the sadness of it being over, like finishing a really good book. It felt very important making this quilt and giving it as a gift, I'm happy to say that it has been used a lot in the past few freezing weeks to keep my mum, passing children, grandchildren and even the dogs warm. It even gives me a bit of a glow to think about it.


Saturday, 15 December 2012

Confronting my old nemesis...


Christmas seems like the perfect time to tackle my old nemesis: zips. I've documented previous bouts with my nemesis, this time, I had my trusty side-kick Janome to help.


I also had an instruction manual and a new zipper foot to help too. The zipper foot on my old machine resembled a flimsy ski that skated along my zips without a care in the world, merrily allowing them to go horribly wrong without a second thought. My new zipper foot is weighty and substantial and not like a ski at all, showing the zip exactly who is the boss; me. Or maybe my machine, the jury is out.


For concealed zips (I don't know how to do any other) I always baste down the opening first - does anyone else do that? I was taught to at my pattern cutting course, it could be a bit of over-kill but it seems to work really well. And lo - the zip went in with no problems at all, not even any up-picking required, the cushion was finished in near record time.


These cushions are going to be a Christmas present for my nieces, they chose the fabric themselves - excellent taste I think. I used a feather cushion pad inside so they are satisfyingly plump and squishy.


This cushion is made from Fox Family and the next from Vintage Stamps; a long time favourite of mine.


And it's a relief to have 2 more handmade presents wrapped and under the tree, with only a week left I have more sewing to do.

In searching for my zipper foot I discovered a whole bag of feet that came with my machine. No idea what most of them are for, but I suspect some involve hems. I have another more substantial foot on the way too.

Happy feet
I hope your Christmas sewing is going well, still plenty of time, no need to panic at all.


Monday, 22 October 2012

Chickopee Quilt

So I can finally show you some finished pictures of the Chickopee quilt. 

Anyone who has organised a wedding with know the hours and days and months of planning it requires. It was wonderful to be part of this very special day and give this quilt to it's newly married owners.

I've been thinking about a triangle quilt since earlier this year when Katy very kindly gave me some Thangles. Although it made the timescales a little tighter, I waited for Chickopee to arrive to make this quilt. The hot, strong colours seemed perfect and I could contrast one dark half of my triangles with a lighter half. It's such an easy way to make the squares - the accuracy of the shapes and stability of the paper made sewing them much easier.


Once I'd made them all, I lay them out on the floor and tried to place them as randomly as possible without having too many of the same colour grouped together but also trying to make a few interesting shapes by putting 2 together here and there. It was surprisingly difficult, but maybe that's just me being a perfectionist. I made sure I photographed the finished order and then piled them up into labelled rows, to make it a bit easier to store inbetween sewing.

I sewed them together in a chain to make the rows and then sewed the rows together to make the quilt, the second stage was really quick and the progress from strips to growing quilt, very satisfying.

I used the programmable text feature on my Janome to write a message on the binding, even after checking and double checking the words I did hold my breath before seeing it finished.

I used the dottie quilt backing in aqua for the back as it matched the Chickopee really well.

And despite checking the length of the binding several times after getting it too short on the last quilt I made, I somehow made the same mistake again, clever old me.

Still, I absolutely love binding the quilt, tidying up those rough edges into something perfect and neat. I save it for a night sat cosy under that new quilt on the sofa, carefully hiding my stitches and slowly making progress around the outside.

I'm really pleased with the final quilt, it was hard to wrap up and take to it's new home as I've grown rather fond of it. But there is something very special about giving a handmade gift to someone you cherish, especially on their wedding day.

And look, the bride (and her bridesmaids) had beautiful bouquets of felt flowers made by a very talented friend, aren't they stunning?


Friday, 19 October 2012

Quilting must have: 1/4 inch seam foot


As a relative new comer to quilting I have definitely struggled with the 1/4 inch seam. It's so tiny and unforgiving and my erratic skills at sewing in a straight line are not suited to it. But I appreciate how much fabric you can save, how the seams are less bulky and there must be something to it as everyone is doing it.


So, on my latest quilt (more on that to follow) which was positively swimming with seams, I finally bought myself a 1/4 inch seam foot. Heading over to the Janome site I was confronted with a lot of different feet which were rather enticing, think of all the clever things I could do with them? 

Firstly I was stumped by the category of my machine, as there were different feet for different categories. A quick call to Janome and the lady on the phone informed me of the correct one for my machine (a Janome  TXL 607). And the next day the foot arrived.


See how at home it looks. I am a total convert, it has transformed my sewing of those tricky little seams, no more fruitlessly trying to match up my fabric to the guidelines on the machine. The black guard lines up the seam perfectly and I can now zip through without really having to engage my brain. Which is probably my favourite way to approach most things in life.

My only regret is that I didn't buy this little beauty earlier. What's your sewing much have? A close second for me is a quilters ruler which was a horribly expensive piece of plastic but again quite in-disposable now I have it.


Tuesday, 12 June 2012

Rogue hexagon quilt - complete


Finally, the rogue hexagon quilt is complete. Gone from being a rather scrappy mess found abandoned around the house for the last few months, to the finished article. I love how it all comes together at the end.


I love this quilt, it really has been a labour of love, hand-stitching those hexagons into submission took hours and hours. But it was nice to have an excuse to sew cozy-ed up on the sofa rather than hunched over my machine.


I used my favourite colours and fabrics on this quilt and it's lovely having them all in one place, like a snap shot of M is for make at that time as many are now sold out. I used grey honeycomb dots for the backing and linen blend in flax for the binding. I quilted a bit more than usual, zig-zagging down alternate rows, I can't deny I still find this process really tedious but I was pleased with the result.


Then came the binding, usually my favourite part, but me being me, I managed to incorporate a mistake or 2 here. Despite measuring (I thought) really carefully and adding in plenty of spare in my length of binding, the 2 ends met with a seam allowance of barely 5mm. It was so close, I also managed to time a couple of the seams on the binding with the corners making them bulky and hard to sew. Which was rather frustrating. But the transformation that binding makes to the quilt made is worthwhile. It is so very satisfying.


I almost forgot to mention the words I put on the side of the quilt. I had a few corking mistakes here too. I programmed the phrase in with my daughter which was great fun, she looked up the letters in the manual and I typed them into the machine. I did a test run and we watched mesmerised as the needle did it's work. It all went well so I started on the binding only to realise part way through the first few letters that I had started too close to the raw edge meaning the letters would be eaten up by the seam allowance, so I to start again. The second time went smoothly, but I had put the words on the wrong side so that the text was visible from the front rather than back of the quilt as I intended.

I decided just to go with it as honestly, I just wanted to finish the darn thing and I'd had enough. I used a very similar colour thread to the binding so the text is not that obvious unless you are looking for it, I hoped to minimise future embarrassment to my son. My mum cleverly spotted mistake 3: no date. How on earth did I forget that? Maybe I will try to hand embroider that in later so that I can terrify myself in years to come with how long ago it was that I made this quilt.


I finished hand sewing the last bit of binding whilst watching the Jubilee celebrations on TV. I presented it to my boy and he was overwhelmed with emotion to receive such handcrafted loveliness from his mum more interested in playing in the garden.

It was a busy bank holiday weekend of Jubilee shenanigans like rainy garden parties, but it a quieter moment when back at home, he did spontaneously say 'thank you for my lovely quilt'.  That boy can wrap me round his little finger. The first night he had it on his bed (it has returned to mid-winter weather after a brief, tantalising glimpse of summer) I had to go and release him from it as he had wrapped it round himself like a cocoon and was slowly cooking like a fine leg of lamb.


Look how it coordinates with his toys, he does have toys that are not grey, but I have locked them away so his room looks perfect and ready for a magazine shoot.

Where to next? I am part way through making one of these with this. But whilst it is so freezing, I'm feeling a little uninspired by summer dresses, so here is a hint of where I might go next. I'm thinking this and this.


PS as requested a photo of the back...


Tuesday, 22 May 2012

Finding the words


As my hexagon quilt is coming very close to being finished with just one row of hexagons to add, I have been thinking about quilting and binding it. The backing, binding and batting are pre-washed and ready to go. Finally I have a chance to dust of my beautiful new machine and stop sewing by hand which is great as that hand is rather sore from it all and it has almost had enough.

I've also been thinking about some words to put on the back of the quilt (which is for my son) and my machine (a Janome  TXL 607) does lettering. I thought it would be beyond me, but it was really easy and great fun to program in a series of letters.

I would want to have a practice run before going for the real thing, especially if putting in a long sentence 'to my darling boy, mummy wuvs you very much, kisses and smooches xxx'.

I'm not really going to write that, so far all I can think of putting is his name and the date, but I want a little more than that - something that he won't cringe at when he is older. 'Mummy wuvs you' is perhaps not the way to go.

So what to write - any thoughts?