Friday, 28 June 2013

Made: Medallion quilt


I was looking through some of my photos yesterday and realised that whilst I blogged endlessly about the making of my Medallion quilt I never actually got round to showing you the finished quilt.


I added a bit of detail to the backing which is new to me. Partly because the fabric wasn't wide enough (and the quilt wasn't wide enough to justify using an extra wide backing). Also because I had some big pieces left of my favourite fabrics and I wanted to use them up.


I had intended to quilt it in quarters, doing an L shape from one side to the other in a right angle. But I lost my way in the middle of the first stretch and came back at an angle rather than 90 degrees. It was a happy accident as I really like the end result (and wouldn't have thought of it otherwise). It gives a kind of union jack effect.


I also used Heirloom batting for the first time which is lovely, it gave a bit more squidge than the Warm and Natural but not too much. 


I pre-washed it despite all advice to the contrary and it did go a bit out of shape. I always feel compelled to pre-wash everything as I can't bear the idea of it changing once I need to wash the finished quilt. What are your thoughts? Any quilt in my house will eventually have to have milk/tea/wine/chocolate/cats washed off it at regular intervals.


Now the cats are not huge fans of sitting on my lap (I think they know how much I want them too) preferring to roost on my daughter instead. However, my lap with a semi-bound quilt in progress was irresistible.


I adore this quilt, I think through a combination of how much time and effort has been spent on it and the sheer number of favourite fabrics that it contains.


I am pleased that I didn't attempt to replace the middle greeny/gold pieces with something just gold in the end. It looks OK, I would have ruined it in the process, and it's a reminder to slow down and go with my gut feeling next time I am picking out fabrics. 


I love the grey comma fabric that I used as a big frame, it arrived just in time and I worked hard to fussy cut the last border.


And even though I finished the quilt in half term at the end of May, I have pretty much had it on the bed every night to warm me during the cold English summers.


It gets a bit of use during the day too. And I have been left with quite a few large scraps so onto the next quilt to use them up. The kids have started asking 'where is this quilt for mummy?' so I have given them the answer 'it's for the car' it's the only part of our extended home without a quilt so far.


Wednesday, 26 June 2013

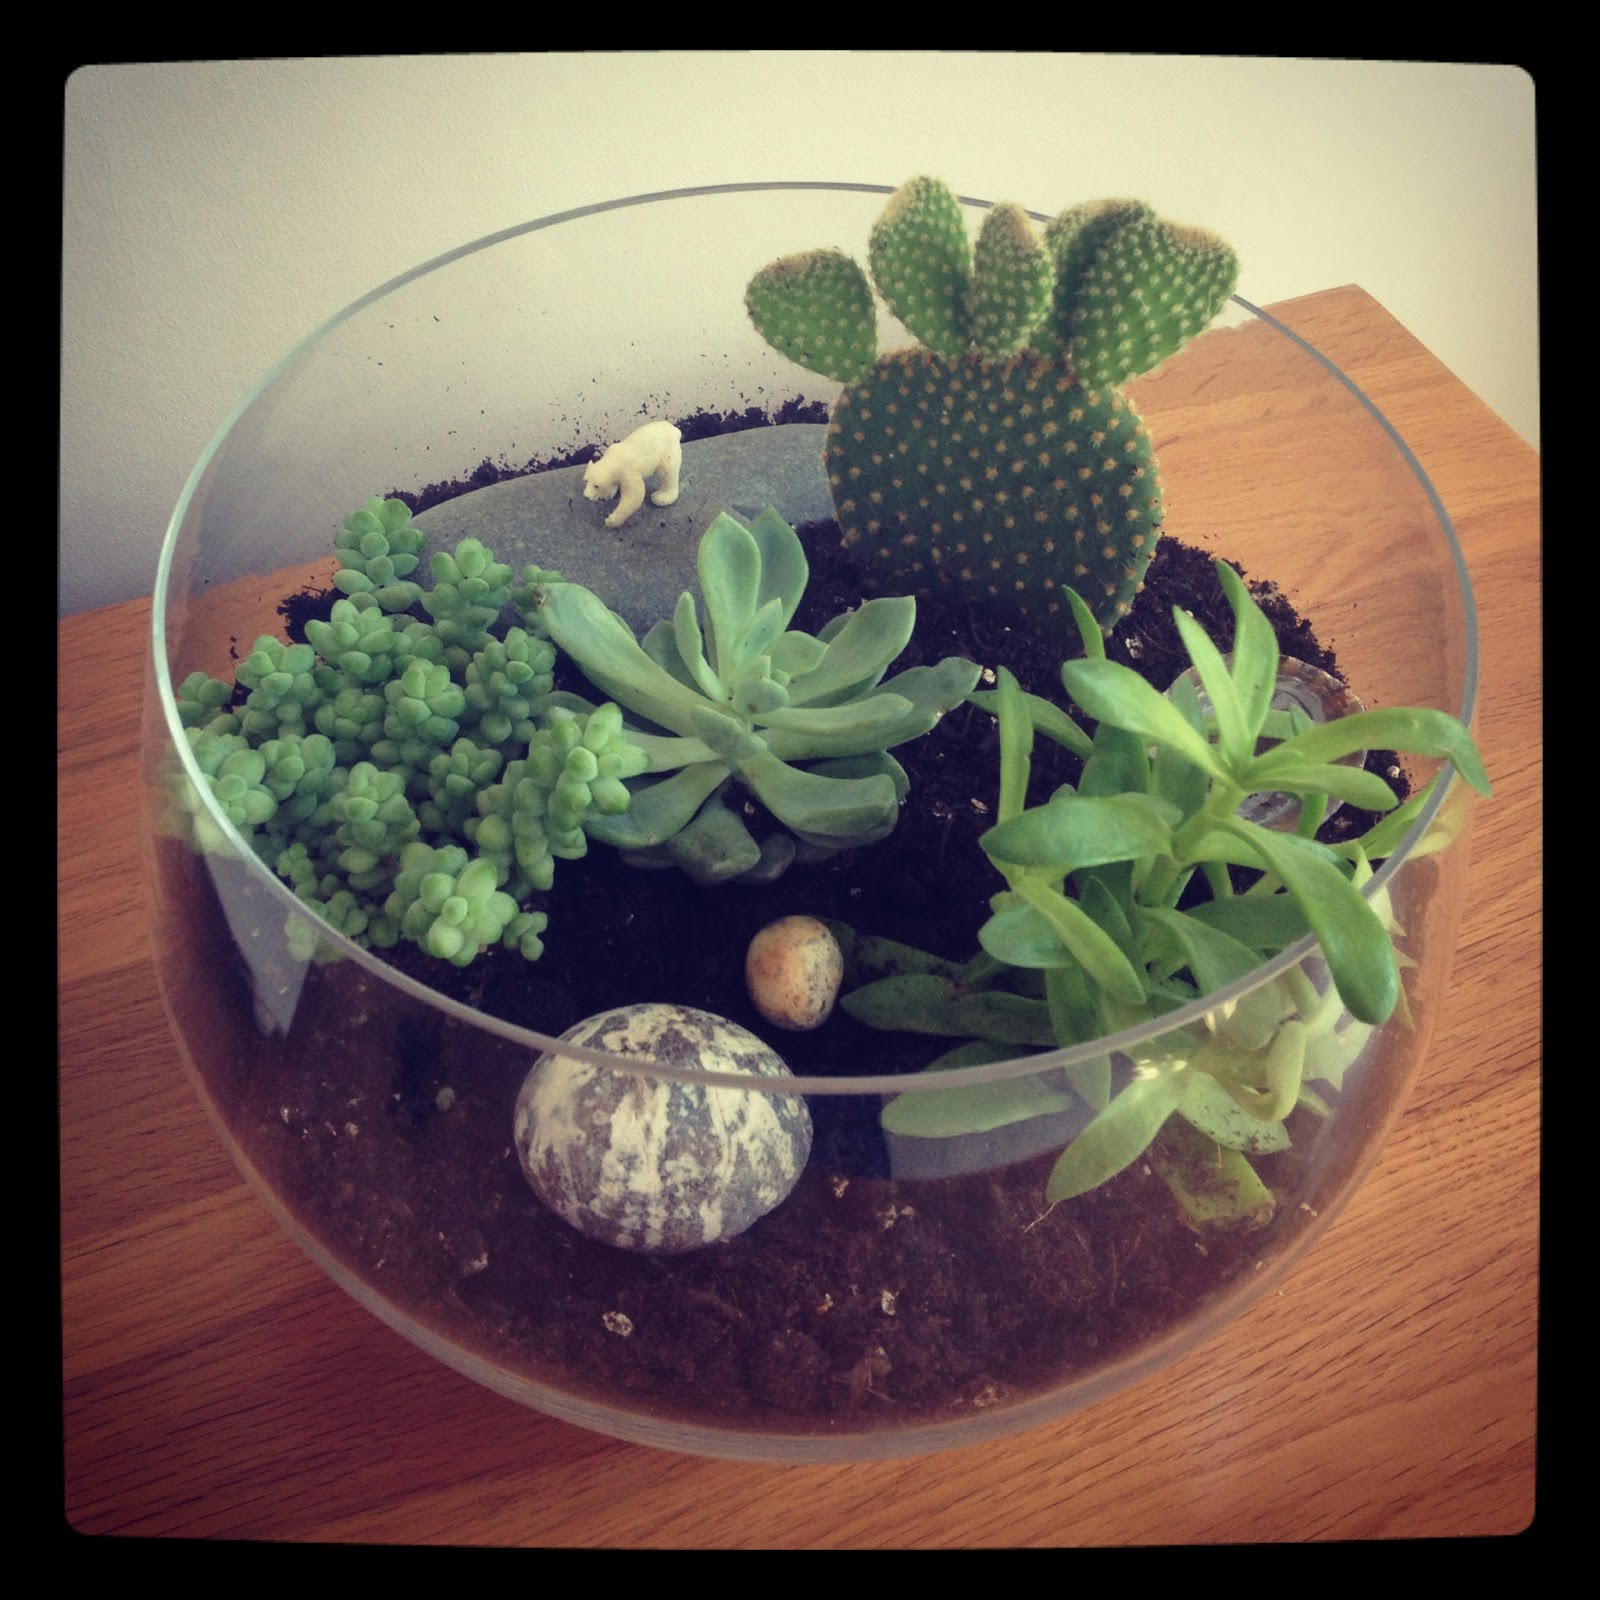
Make: a terranium


I have been obsessively collecting beautiful pictures of terrariums on Pinterest for a while now. They are so tiny and pretty and I finally got round to making one. After lots of research on the internet it seems you need a few key things:


  • gravel/small stones - I used those tiny pebbles you can buy from an aquarium shop
  • horticultural charcoal to keep the terrarium clean and fresh - I couldn't find this so a few places again referred me to the type used in fish tanks, and I bought a bag of this
  • compost: I managed to find one specifically for cactus and succulents at my local garden centre, but normal compost will do
  • cactus, succulents, plants that can survive somewhere dry and will not grow too big
  • pretty pebbles and accessories like tiny beasts
  • a glass bowl or vase

Bear in mind you want the top level of the compost to fill the bowl to about 2/3 giving your plants room so they mostly sit inside the bowl. First up carefully put in a layer of pebbles, mine were about an inch deep. Then add a thin layer of the charcoal just to cover the pebbles, carefully because if you mix up the layers, it can look a bit of a mess.


Give your plants a bit of a water before you put them in the terrarium as you will want to leave them a few days to settle before watering them again. Take them out of their pots and fiddle around with placement, experiment with what looks best and think about where you want to put any rocks etc and how these will fit in.


When you are happy with their placement, fill in the gaps carefully with compost (I used a spoon), again, try not to mix with the layer below.


Once the plants are in, use a paint brush to clear the compost off the plants. Warning: this is fun.

After I had finished putting the plants in, I was surprised how disappointing it looked. But the terrarium was completely transformed by some rocks and shells.


We always come back from the beach with a few precious rocks that we have collected, this is the perfect home for them.


I also found these tiny animals to roam our new mini world, this polar bear lives with a particularly fierce cactus, I spent a long time tweezing splinters from that out of my hand.


Terrariums are really easy to maintain, don't be tempted to over water them or risk it going moldy. Keep an eye on the plants to make sure they are all doing ok and give them the occasional tweak and prune. And enjoy! I love our 2 they are a source of fascination to all visitors to our house big and small. 

Have you ever made one? I would love to have a few hanging ones too.

New in: Technicolour


New in: these gorgeous prints from the 'Technicolor' collection by Emily Herrick.