Thursday, 31 March 2011

5. Making adjustments


Posts in this series:
1. Sewing from Japanese Craft books - what you will need and an overview
2. Sizing and figuring out the instruction page
3. Tracing out the pattern pieces 
4.  Sewing the garment

So last time I finished making the rough version of the my blouse and decided it needed a few adjustments. Here is it before...


And here is it after...

spot the difference?!

There is less fullness on the sides and I have shortened it to the desired length. I took in the sides by looking at the side seam, from the arm hole down a short distance, the seam was curved, but from then on it was straight to the bottom. So I measured in about 4cm from the side at the bottom of the seam and drew a straight line from this to the point at which the seam became straight. I then added the seam allowance back on.

To take up the hem around the bottom, I measured 5cm (the distance I shortened it, taking into account the amount I wanted to leave to make the hem) all the way along parallel to the bottom of the pattern piece and then joined it up.

I did these adjustments to both the front and back bodice.


So my pattern pieces are ready to go. Now I just have to choose my fabric. I'd always been planning to make it from voile as I think it would be perfect for this top. So the question is, which one?

Blush from the Innocent Crush collection?


Or maybe Heather?


Who I am kidding? whilst these are both very lovely, I've known right from the start that it was going to be sixpence.


So I am going to get sewing. I need to pre-wash my fabric, and get a few supplies including an overlock foot to tidy my seams after having a revelation reading this post by Gertie and then spurred on by this post by Jane.

Speaking of Jane, she has already finished her skirt from Simple Chic and I think it looks amazing, I hope this has given you some inspiration. This is the first garment Jane has made from a Japanese pattern book.

Monday, 28 March 2011

Vintage Patterns of Japan


This beautiful book arrived from Amazon today. It's called 'Vintage Patterns of Japan'.


I saw it in a book shop in town, but didn't buy it as it's pretty expensive, but immediately wished I had when I got home because it is a brilliant source book for patterns and colours.


There are beautiful candy colours and traditional patterns and designs.


I think they'd be great for screenprinting inspiration, or embroidery.


Or maybe, just some sketching.


I'd also like to do a bit of lino-cutting and these look perfect for that.


I don't actually have time to do any of these things at the moment, but once I have cloned myself, there'll be no problems, and I'll be crafting to my hearts content.


In the meantime, there is always time for biscuits.

Saturday, 26 March 2011

4. Sewing the garment


Posts in this series:
1. Sewing from Japanese Craft books - what you will need and an overview
2. Sizing and figuring out the instruction page
3. Tracing out the pattern pieces


Cutting out the fabric from the pattern is the same as for any commercial pattern. After looking at the layout diagram in post 2, I know where the fold is and I transferred the grain lines from the pattern sheet in post 3 so I know which direction to place my pattern pieces in.

Make sure you transfer all the markings from the pattern to the fabric. For this pattern I have also written which is the front and back piece as they are quite similar. I've done this for the bodice and facing.


So looking at the numbered diagram, I can see the order in which I need to put my top together. First up is sewing the pleats around the neck, then sewing up the sides, and so on.


Half the instructions for my top (C2) are shared with the other 2 garments in the C family, so they are found on a previous page for dress C1. I have transferred the markings for my pleats and they are straight forward to sew. One point to note (more so when I am making up the final garment) is which is the right and wrong side of the fabric so that I get my pleats the right way round.


I sew my pleats, iron them as per the diagram, then sew along the top to hold them in place. I do this for both the front and the back bodice pieces. I have chosen to make my rough version of this top using calico, ideally I should have used something lighter and closer in weight to the final fabric I will use as it’s quite stiff. Whilst it’s not a big problem, it won’t quite show me what the final top will be like as it won’t hang the same.

I then sew together the side seams and can see that it looks quite big, so I think I may have to make a few adjustments when this test version of the top is finished.


I should then sew the hem around the bottom, but I'm not going to bother as this is the rough version and I want to check the length when it's finished.


Next up are the sleeves and these are specific to this top and so on the instructions page for C2. I can see that I need to hem both the top and bottom layers of the sleeve but as it is the rough version, I won’t bother doing this to save time, instead I trim off 1cm where the hem would have been so that they will be the right length when I try them on. I join them together along the top, add the pleats and then sew the pleats in place as per the picture and markings I have transferred from the pattern.


Next, I join the sleeves to the main body of the garment. This is straighforward enough, but first time round I manage to sew them on upside down. Second time, I refer to the pattern where I have labelled where it attaches to the front and back and think about which is the right and wrong side of the sleeve. This time, I manage to get it the right way. 

The next step is to bias bind the remainder of the armhole, but as this is a rough version I don't bother. If this is your first time using bias binding I would do a trial run for the practice.


Next up the facings and back to the instructions for dress C1 for this. They are numbered 1 - 6 in the diagram: 

1. Sew them together at the sides, 
2. Finish the raw edge of the facing (I didn't do this on this version but would probably do this first on my proper top as it would be easier to do when it's not attached to the top.)
3. Pin the combined facing right sides together to the neckline of the top making sure it lines up at the centre and shoulders and then sew all the way around. Then sew them together (using a 1cm seam allowance as this is what I added to the pattern)
4. Clip the seam allowance
5. Iron the garment inside out
6. Sew down the side of the pleats to hold them in place.


When I make my final garment, I think I will also top stitch the neckline to stop it from rolling out.


Finished!


After my initial hesitation about it being too big, it actually fits perfectly on top. I think it might be a little full so I am going to see how it looks with a little less fullness by taking some out of the side seam. I also need to figure out how long I want it to be.


I am also a bit concerned about the sleeves will stick up gladiator style. Again I wished I'd used something lighter to make this top as the calico is so stiff I don't think it's helping. I am planning to make it in voile and I think as this is much softer, it will be ok.


So I'm going to go away, make a few adjustments and perfect my fit, before starting the final garment. But one thing that has surprised me is that this was really quick to make, I guess it would take a little longer with finishing the hems and armholes.

So is anyone else making any progress?


Thursday, 17 March 2011

3. Tracing out the pattern pieces


Posts in this series:
1. Sewing from Japanese Craft books - what you will need and an overview
2. Sizing and figuring out the instruction page

Next to the pattern sheet, as I mentioned before, don’t be daunted when you open it up, although it looks indecipherable, it is not. Do not forget that pattern pieces do not include the seam allowance, you will need to add this on after you have traced it off.

Sometimes I get confused when trying to find my pattern pieces on the sheet and my garment letter is not there. This is almost certainly because the pattern shares pieces with another pattern (so they have some kind of combined reference letter) or because it is simple enough (e.g. a square, rectangle or triangle) and does not need one and you draw it yourself.

Pattern pieces are drawn on both sides of the sheet. All the pieces for each individual pattern will be on the same side, and sometimes, like in Feminine Wardrobe, they will be in a particular colour. All the pieces for my top are outlined in red, but there are other pattern pieces there in black (and red), this makes it a little easier.


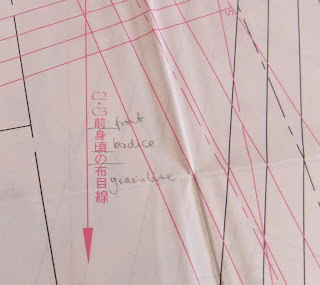
There is a often small diagram showing which garments are on each side. Your garment's pattern pieces should be referenced by the same letter as shown next to the picture at the front of the book. My top (C2) the dress (C1) and other top (C3) collectively share some pattern pieces that are referenced as C, but there are some pieces specific to my top that are labelled C2. On the front and back bodice piece, different garments in the C family are different lengths, so make sure you trace off the correct outline for your garment. I think this refers back to the extra page before the instructions mentioned in post 2 that shows the different bodice lengths of the C variations.


With your book open on the instructions page, look at the fabric layout diagram and figure out which pieces you need. I need a front and back bodice, 2 sleeve pieces and a front and back facing.


Starting with the sleeve, I can see it here, labelled C2. I always trace my finger round the outside of the shape to figure out where it begins and ends and to look out for any important markings. Take a piece of paper bigger than the shape and using small bits of masking tape position it over the top of the outline on the pattern sheet.


I use masking tape to hold it in place as I find it a nightmare to line it up again when it’s moved. Make sure you leave enough spare paper around the outside of the shape to add on the seam allowance later. It’s very annoying taping on odd strips of paper for your seam. Remember hems for example will require a longer seam allowance.

Find the outline for your size and draw around it, checking periodically that you are still tracing around the right shape. Once you have done this, peel up one side of the pattern piece keeping the other side stuck down still and spot any markings you may need to transfer such as the grainline, pleat lines, places to attach other parts, make sure you are not transferring anything from a different overlaying pattern piece.


Further inspection of the sleeve shows me that there are actually 2 pieces here for the 2 layers of the sleeve and one is bigger than the other. I have drawn both sleeves on the one piece incase I can get away with not having to draw 2 of them.

Once you are happy that you have transferred all the information, unstick your piece of paper and start to translate some of the information.


I always try to translate everything I can on the patterns. On the translation sheet, words are grouped by type so I think about what it could mean and start in the group of translations I think it is going to be in before moving on to the others if it’s not there. Symbols are grouped together so you might find ‘front’, ‘facing’, or ‘middle’ ‘fold line’. I look for a distinguishing feature in the symbol for example if it looks like a gate and scan down the translations for that particular feature.

As you label each pattern piece, try to put on what it is e.g. a sleeve, the reference of the garment, C2, and the name of the book. I also find it useful to write on the size I have cut out.

Next up is the front bodice, this is just labelled ‘C’ as it is the same for all 3 garments in the C family and looking at the hem, I can see a line for C1, C2 and C3 so I know which one to follow.

I trace it off using the same technique as the sleeve, making sure to leave enough blank space around the sides to add the seam allowance and also a fair bit of space at the hem as I want to lengthen it about 10 – 15 cm because of my big long back.


After that I trace off the back bodice in the same way as the front. Then find the facings which are specific to this pattern and labelled C2. Again, copy over the translations.


All done, I have traced off all my pieces and just have to add the seam allowances. Refer back to the layout diagram to see if any seam allowances are specified there, they are not always. On my diagram, the hems are, but the rest are left to me so I am going to use 1cm.

This is where I find the pattern master really helpful as it has lines drawn along the straight and curved edge at 5mm intervals making it pretty easy to add on my seam allowance and get a nice smooth curve. If you don’t have one of these, you could use a compass to trace along the line or mark off with a ruler at regular intervals and then join up the marks to make your seam allowance. If you do this, make sure to mark off more frequently on the curves so that they are accurate.

As I have decided to extend the hem down, I’ve added about 15cm which is probably too long but I find it easier to then shorten rather than lengthen a pattern piece.

When you have finished adding the seam allowance, put them all out, make sure they are labelled and keep them stored together in a folder or similar so that you don’t lose any or mix them up with another pattern.

Next time I will cut out the fabric and think about sewing it all together.

Posts in this series:
1. Sewing from Japanese Craft books - what you will need and an overview
2. Sizing and figuring out the instruction page
3. Tracing out the pattern pieces

Friday, 11 March 2011

Friday Crochet

It's all about crochet this Friday and I am very excited to have a guest blog by Amy from No More Disco, enjoy!


I love to crochet. Since learning exactly how to do it at a wool shop just over a year and a half ago I have delighted in creating fabrics and other ephemera through the simple act of pulling loops of yarn through other loops.


Although it’s similar to knitting, crochet differs in that you only ever have one stitch active on your hook at any one time. This, for me has made it my preferred yarn activity. Any mistakes (and I make A LOT of these) and you can literally rip your work up to the point you want to continue from. There is no need to painstakingly unpick each stitch one at a time worrying whether you are twisting the yarn the wrong way on the needles like in knitting. This means it’s very portable. You always know where you are.

The bestselling ‘Happy Hooker’ by Debbie Stoller was published in 2006 which fed off the success of the stitch and bitch knitting fever and since then crochet’s experienced a massive resurgence and is more in favour than ever before. It’s moved on from traditional granny square blankets and doilies that your nan had under just about everything in her house. Now we’re starting to see the emergence of more sophisticated, cleverly crafted, contemporary designs in homeware, accessories and fashion. And some are extremely covetable. Here’s just a few of my favourite things I found on the net.

The mega doily. Truly a thing of great beauty, made from rope Jean took her love of vintage doilies to the extreme and hand (!) crochets these rugs;


A stunning centrepiece for the table crocheted from wire:


Linen Pincushion from namolio would make a welcome addition to any sewing kit.


And now crocheted stones? Who’d have thunk it huh? But aren’t these just amazing?


And we can’t have a post on crochet without some contemporary covetable afghans in modern hues. These are relevant designs for modern surroundings.


Crochet is easy enough to pick up. I could not fathom it for the life of me until that fateful class 18 months ago that began my love affair. However I defy anyone to fail to learn after just a small bit of practice (practice is key – like most things!) and not only is it accessible but it’s hugely versatile with the ability to create countless textures and effects. Work ‘grows’ quickly making it instantly gratifying and there is no limit to the inspiration to be found on the internet. It’s fantastic for fashioning trims, making throws, creating jewellery and so much more. You can use a wealth of different materials, rope, wire, yarn, cotton, twine, raffia – people are even crocheting plastic bags!

To get you started I can’t recommend  enough ‘Compendium of crochet techniques’ I have a huge amount of crochet books but this is seriously the ‘go to’ book. For projects give Erika Knight’s ‘Essential Crochet’ a try, and one of my favourites: Linda Permann ‘Crochet adorned'.


I’ve not even mentioned amirugumi  (crocheted toys) and I know there’s nothing on clothing except the strangely seductive first image but there is so much to say about crochet so here ends the crochet fest. I’ve enjoyed it immensely. Thanks for having me Kate and happy hooking people. Enjoy.


Thanks so much Amy! these pictures are inspiring - you can find more from Amy at her blog No More Disco.