Thursday, 17 March 2011
3. Tracing out the pattern pieces
Posts in this series:
1. Sewing from Japanese Craft books - what you will need and an overview
2. Sizing and figuring out the instruction page
Next to the pattern sheet, as I mentioned before, don’t be daunted when you open it up, although it looks indecipherable, it is not. Do not forget that pattern pieces do not include the seam allowance, you will need to add this on after you have traced it off.
Sometimes I get confused when trying to find my pattern pieces on the sheet and my garment letter is not there. This is almost certainly because the pattern shares pieces with another pattern (so they have some kind of combined reference letter) or because it is simple enough (e.g. a square, rectangle or triangle) and does not need one and you draw it yourself.
Pattern pieces are drawn on both sides of the sheet. All the pieces for each individual pattern will be on the same side, and sometimes, like in Feminine Wardrobe, they will be in a particular colour. All the pieces for my top are outlined in red, but there are other pattern pieces there in black (and red), this makes it a little easier.
There is a often small diagram showing which garments are on each side. Your garment's pattern pieces should be referenced by the same letter as shown next to the picture at the front of the book. My top (C2) the dress (C1) and other top (C3) collectively share some pattern pieces that are referenced as C, but there are some pieces specific to my top that are labelled C2. On the front and back bodice piece, different garments in the C family are different lengths, so make sure you trace off the correct outline for your garment. I think this refers back to the extra page before the instructions mentioned in post 2 that shows the different bodice lengths of the C variations.
With your book open on the instructions page, look at the fabric layout diagram and figure out which pieces you need. I need a front and back bodice, 2 sleeve pieces and a front and back facing.
Starting with the sleeve, I can see it here, labelled C2. I always trace my finger round the outside of the shape to figure out where it begins and ends and to look out for any important markings. Take a piece of paper bigger than the shape and using small bits of masking tape position it over the top of the outline on the pattern sheet.
I use masking tape to hold it in place as I find it a nightmare to line it up again when it’s moved. Make sure you leave enough spare paper around the outside of the shape to add on the seam allowance later. It’s very annoying taping on odd strips of paper for your seam. Remember hems for example will require a longer seam allowance.
Find the outline for your size and draw around it, checking periodically that you are still tracing around the right shape. Once you have done this, peel up one side of the pattern piece keeping the other side stuck down still and spot any markings you may need to transfer such as the grainline, pleat lines, places to attach other parts, make sure you are not transferring anything from a different overlaying pattern piece.
Further inspection of the sleeve shows me that there are actually 2 pieces here for the 2 layers of the sleeve and one is bigger than the other. I have drawn both sleeves on the one piece incase I can get away with not having to draw 2 of them.
Once you are happy that you have transferred all the information, unstick your piece of paper and start to translate some of the information.
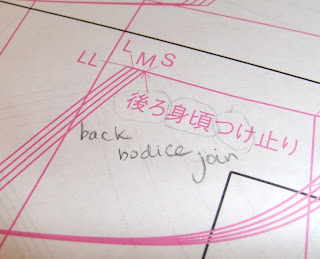
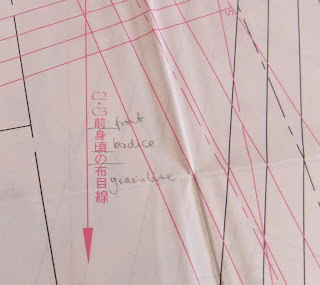
I always try to translate everything I can on the patterns. On the translation sheet, words are grouped by type so I think about what it could mean and start in the group of translations I think it is going to be in before moving on to the others if it’s not there. Symbols are grouped together so you might find ‘front’, ‘facing’, or ‘middle’ ‘fold line’. I look for a distinguishing feature in the symbol for example if it looks like a gate and scan down the translations for that particular feature.
As you label each pattern piece, try to put on what it is e.g. a sleeve, the reference of the garment, C2, and the name of the book. I also find it useful to write on the size I have cut out.
Next up is the front bodice, this is just labelled ‘C’ as it is the same for all 3 garments in the C family and looking at the hem, I can see a line for C1, C2 and C3 so I know which one to follow.
I trace it off using the same technique as the sleeve, making sure to leave enough blank space around the sides to add the seam allowance and also a fair bit of space at the hem as I want to lengthen it about 10 – 15 cm because of my big long back.
After that I trace off the back bodice in the same way as the front. Then find the facings which are specific to this pattern and labelled C2. Again, copy over the translations.
All done, I have traced off all my pieces and just have to add the seam allowances. Refer back to the layout diagram to see if any seam allowances are specified there, they are not always. On my diagram, the hems are, but the rest are left to me so I am going to use 1cm.
This is where I find the pattern master really helpful as it has lines drawn along the straight and curved edge at 5mm intervals making it pretty easy to add on my seam allowance and get a nice smooth curve. If you don’t have one of these, you could use a compass to trace along the line or mark off with a ruler at regular intervals and then join up the marks to make your seam allowance. If you do this, make sure to mark off more frequently on the curves so that they are accurate.
As I have decided to extend the hem down, I’ve added about 15cm which is probably too long but I find it easier to then shorten rather than lengthen a pattern piece.
When you have finished adding the seam allowance, put them all out, make sure they are labelled and keep them stored together in a folder or similar so that you don’t lose any or mix them up with another pattern.
Next time I will cut out the fabric and think about sewing it all together.
Posts in this series:
1. Sewing from Japanese Craft books - what you will need and an overview
2. Sizing and figuring out the instruction page
3. Tracing out the pattern pieces
Labels:
Japanese book sew along
Subscribe to:
Post Comments (Atom)


No comments:
Post a Comment